



Building a fire pit is a weekend project: a ring of landscape blocks on a gravel base, lined with a steel fire ring. This guide walks through how to build a fire pit in 8 steps, what Toronto and Mississauga allow before you dig, and how to keep it safe.
If you would rather skip the digging, WickerPark builds outdoor fire pits and concrete fire tables in Ontario.
Before you build: check what your city allows
Fire pit rules are set by your municipality, and they differ a lot across the GTA.
- Toronto: Toronto Fire Services does not permit wood-fuelled fire pits, chimineas or fire bowls, except for a small, confined fire used to cook food. Natural gas and propane fire pits that meet Technical Standards and Safety Authority requirements are allowed without a permit. Read Toronto's open air burning rules.
- Mississauga: Under the Open Air Burning By-law 140-18, an outdoor fire pit can be used without a permit between sunrise and 11 p.m. if the fire area is no larger than 1 metre in any direction, it sits at least 5 metres from any building, structure, property line, tree, hedge, fence, roadway or overhead wire, a fire extinguisher or garden hose is ready, and someone watches it until it is fully out. No open air burning is allowed during a smog alert. Read the current by-law.
- Everywhere else: check your city or town's open air burning by-law and any fire ban before you build. Rules change, and fire bans can be issued during dry spells or air quality alerts.
What you need
- Retaining wall blocks or landscape blocks (about 30 to 45 for a three-course ring, depending on block size)
- A steel fire ring sized to the inside of your pit
- Gravel or paver base, plus extra gravel or lava rock for the pit floor
- Masonry adhesive (optional, for the upper courses)
- Shovel, stake and string, tape measure, tamper, level and rubber mallet
How to build a fire pit in 8 steps
1. Choose the spot
Pick level ground away from your house, fences, sheds, trees and overhanging branches. In Mississauga the by-law sets the minimum at 5 metres from buildings, property lines, trees and fences. Make sure your garden hose reaches the spot.
2. Mark the circle
Drive a stake in the centre and use a string to mark the inside and outside edges of the ring. An inside diameter of about 80 to 100 cm (32 to 40 inches) suits most steel fire rings. In Mississauga, keep the fire area itself within 1 metre across.
3. Dig out the base
Remove the grass and roots inside the outer circle and dig down about 15 to 20 cm (6 to 8 inches). Keep the bottom as level as you can.
4. Add and compact a gravel base
Spread 5 to 10 cm (2 to 4 inches) of gravel or paver base, tamp it down firmly, and check it with a level. The base drains water away and stops the ring from shifting through freeze and thaw.
5. Lay the first course of blocks
Set the first ring of blocks on the gravel, tapping each one level with a rubber mallet. Check the level across the whole ring before you go higher, since every course sits on this one.
6. Set the steel fire ring
Place the steel fire ring inside the first course. Ordinary concrete blocks can crack and crumble under direct heat, and the ring takes that heat instead, which makes the whole pit last longer.
7. Add the remaining courses
Lay two more courses, staggering the joints so each block bridges the two below it. Use masonry adhesive between courses if you want a more permanent build. Leave a few small gaps in the bottom course so air can reach the fire.
8. Finish the floor and let it cure
Fill the bottom of the pit with 5 to 10 cm of gravel or lava rock. If you used adhesive, let it cure for the time on the label, then start with a small fire.
Fire pit safety and care
- Keep a garden hose or fire extinguisher within reach every time you light it.
- Never leave a fire unattended, and put it out completely before you go inside.
- Burn only clean, dry firewood. Never burn leaves, garbage, plastics or anything with an accelerant like gasoline.
- Keep children and pets back from the ring, since the blocks stay hot long after the flames are out.
- Clear out ash between fires, and cover the pit in the off-season so water does not sit in it and freeze.
Rather buy than build?
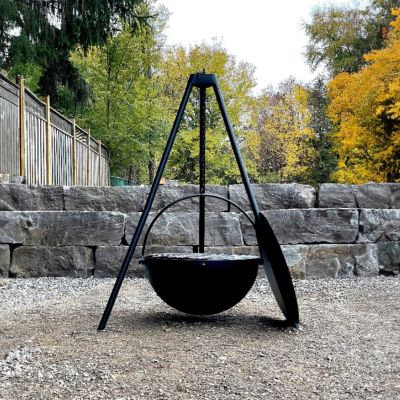
A ready-made fire pit skips the digging and can move with you. Our Frontier steel cauldron fire pits and steel fire bowls and basins are built in Ontario. In Toronto, where wood fires are only allowed for cooking, a certified gas or propane fire table is the legal choice.
Not sure which suits your space? Start with Fire Pit vs Fire Table: Which Is Right for Your Patio, then our fire table buying guide. For seating layouts around a flame, see Hosting Around a Fire Pit or Fire Table.